Browsed by
Category: Career

Impossible Creatures

Impossible Creatures

ic_1

Still, one of my favorites games of all time.  I usually fire up an old Windows box and play the campaign over Christmas break.

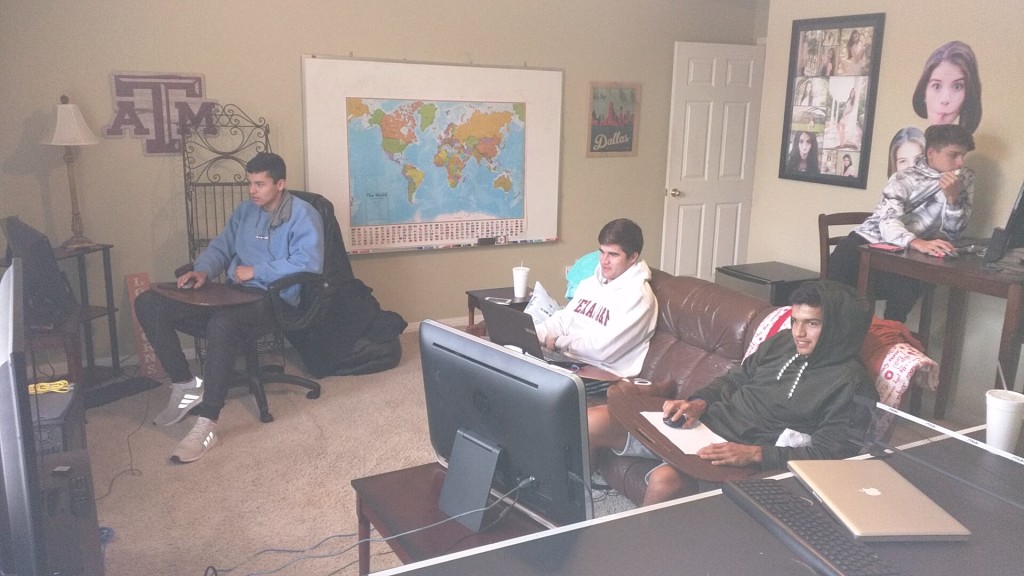
I managed to network 4 stations and the cousins came over for an afternoon of Impossible Creatures frenzy!
 

RiedMeyer_IC_2017_2

Tips
Level 6
This is a hard level.
Enemy will attack quickly so need to fend off with 1 or 2 level animals
In the mean time try to level up to 5 as soon as reasonably possible
Gather coal at all 3 areas along West and South border.
Take Rex to right side of map and collect Crocodile to make Lobster Crocs. You will need to use them to fend off the very tough turtle eels that come through the tunnel.
Once area is cleared of enemy in Part 1, setup base near copter pad, protecting it with 2 anti-air, collect coal, and add an air-chamber.
Create Dragonfly Crocs to help protect Lobster crocs against flying enemies and to fly over to right bottom side to protect new base.
Leave some range animals back at base as enemy may send whales from water to attack.
Build water chamber back at base and send some Lobster Crocs around south near new base so they can quickly be air lifted out of water onto land near base. Leave 2-3 Lobster Crocks at water chamber in case enemy sends whales around to attack from water.
Once you have the enemy coming from tunnel under control, send several Lobster Crocks to southern end of east side to be picked up by helicopter and placed on land. Once you’ve placed 2-3 of them, bring over fleat of Dragon Crocks (8?) to help protect new base, bring 2 henchman over and build 2 anti-air towers and establish coal camp. Bring more henchman over when you can as you defend the new base.
Level 9
This level has enemy generators that can be taken down for the win. The one at 1:00 near 2nd base can be taken down by dropping a range animal on plateau using helicopter. This this first, it will take 1 animal a while to destroy it. The one in water about 4:00 is undefended. The 3rd found around 7:00 can be attacked from 1st base with about 8 Lobster crocks. The last one around 4:00 can be attacked with around 10 Lobster crocks. The main base can actually be attacked with a full army of lobster crocks. I would attack from North, West and South so they don’t get bottle-necked at defenses.
Level 10
You have several enemy bases to destroy. You will need lots of animals so locate and setup a bunch of coal collection. Build helicopter and drop henchman on plateau at around 4:00 to collect coal. Try to get to center area with coal quickly and then to around 2:00 coal area. Build up your army just before 12:00 enemies and just before army at 2:00. Attack 2:00 before 12:00. You will need anti-air towers to attack 12:00 army. Place at least 2 anti-air at all coal collection sites. Bring small contingency of range animals to help defend from air-attack when attacking bases. Maybe bring 4 henchman to create air-towers as well.
Level 14
Need lots of coal this. level. Get to level 4 quickly and send army to reach 3:00 area with Level 5 in progress. Get there as soon as possible, don’t worry about animals or defenses along way, just survive, beat animals at end and setup base with Lobster Crocks. Create 3 air-defenses between 2 sets of coal piles. Should have stable base there with about 5:00 left. Build up army of about 10-15 Lobster Crocks and attack lab with Rex (need to cure him immediately) no later than 1 min left. Place 3 creature chambers in spilled antidote so creatures created are immune. Add at least 2 anti-air towers. Leave 3 range animals to take out single animals that may attack send all others forward.
Level 15
Killer Whale Lobster
KW: Head, Tail. L: Body
Health: 717 Defense: 60, Speed: 10/30, Sight Radius: 25, Size: 9

Chameleon Hippo
CH: Head, H: Front legs, body, back legs, tail
Health: 264, Defense 46, Speed 16/22, Sight Radious 30, Size 6

Setup coal collection just north of base, and left of base and then above to left of that one. Place water chamber to right of base and leave about 3-4 KillLobsters a little up from base near coal collection as attacks will come from water. Setup 2-3 air-towers at each coal collection.
Once these coal collections are establish establish last one at far end of map around 1:00

Max out abilities of the two 5 Animals and defend as animals are sent down from Ganglians base. Use Rex heavily. If you can defend the waves eventually you will starve Ganglian. Between waves send Chamatamus up a bit to take out defense towers. Try to save injured animals so they can regenerate. Once the attacks slow you can go up and take out Ganglian then keep going and take out Julius

My 3 Monitor Development Workstation

My 3 Monitor Development Workstation

I’ve been working at home with my new company DigitalHarmonyGames.  I picked up a 2nd 23in monitor adding to my work Macbook Pro 17in I now have a triple monitor setup.  I have Unity3d running on one external, MonoDevelop on the other external and I do mail, skype and web surfing on the Laptop screen.  The 2nd external monitor was made possible by the $50 Cirago USB Display Adapter.  The USB adapter works great.  As long as I don’t run full-screen video or run anything that is too demanding on the usb connected monitor the setup works perfectly.

Raylight and MXF Metadata

Raylight and MXF Metadata

The Iditarod Trail Committee (ITC) is one of our customers.

According to Jan, the ITC is making great use of our metadata support.  She writes:

The ITC also made a very cool use of the metadata and Raylight. Metadata files were created to correspond with the many checkpoints across the trail. There are 10 cameras and 6-7 shooters out there filling up cards, As each shooter enters a new checkpoint they load the next Metadata file. So when the cards are ingested with Raylight, Raylight sorts the clips into the appropriate folders according to checkpoint, regardless of shooter or camera. Now when the editor sits down to edit they are organized for the edit, they know the story, and where it happened, and they know where the clips are. Pretty cool. Now this is what the ITC, Original organized by shooter, and that may be more appropriate for their production as certain folks were assigned to certain mushers. All-in-all I think that this is the most footage collected on a singular subject, except Olympic coverage and that isn’t quite the same, in the world of P2HD production.

DVFilm and Raylight

DVFilm and Raylight

It’s not easy explaining my job to friends and family.  I explain “I help write software that helps film makers in their post production editing”.  My bio on our website describes what I do more succinctly: “…develop new software products for the Raylight family of plugins for HD editing”. People generally understand that but to be more specific requires some knowledge of film post production work flow and/or familiarity with high-end video editing software such as Sony Vegas, Adobe Premier, or Apple’s Final Cut

Specifically, this is how our software can help a film maker during editing.

DVXUSER.COM is the place to go for discussions and help on film making.  Our Raylight product is well known and recommended there because it solves some work flow problems.

Here are some of the threads at DVXUSER describing why people use our products:

P2 Card transfers

cheap pc laptop- P2 re capture to mac workflow

How Raylight works around Apple’s Final Cut software issues

“Get Raylight, and all this will disappear. Raylight fixes every problem that Apple seems to introduce. It seems like every other version Apple breaks something in their log & transfer/import P2 functionality. Raylight has been stable and fixes all that, plus it lets you avoid all the duplicate file size stuff and the time it takes to import footage. Now more than ever I consider Raylight a mandatory portion of an FCP workflow.”

Q. Raylight is a way to access your P2 footage without changing or converting it in any way? I guess what I want to know is does it actually remove the pulldown or just let FCP see it that way. Can Raylight in any way change the information I save from each P2 card dump to my hard drive. I downloaded the demo but am still a bit confused.

A. FCP does a translation of MXF files into Quicktime files all in one go. Raylight does it on-the-fly, as-needed. So your original footage stays untouched in MXF format, but Raylight creates a Quicktime reference file that FCP can use.
The difference is that you get instantaneous access to your footage, instead of having to go through the Log & Transfer process. And you can work from the original footage or even the P2 cards if you want, whereas FCP’s Log & Transfer forces you to take up twice as much space by creating Quicktime files (which take up space but also take time). Plus, because you avoid the whole Log & Transfer process, you avoid any issues that crop up when Apple breaks their system (which has happened on more than one occasion).
So Raylight doesn’t change anything. Your original footage stays intact, unmodified, untouched. But it can automatically skip 24pA pulldown, which is very nice and gives you access to the true pure raw 24P footage.
“I would say most people I know who shoot HD and edit on a mac absolutely use Raylight. Its a no-brainer and makes the post process totally painless.”
Ultimately yes, it’s the fault of Apple for insisting on converting away from the native file format when no other editor makes you do that. However, that’s completely overcomable on both sides — on the Apple side you can use Raylight and edit the native MXFs and never run into this again. Or, on the Windows side, now that the damage is done, you can use the Raylight Quicktime Decoder and access the Quicktime DVCPRO-HD files.So either way Marcus can bail you out.

Concise statement of why you use Raylight with FCP even though there is a way to ingest MXF files directly with FCP

Accolades to Marcus for Raylight

THANK YOU for doing all that you’ve done to solve these problems of various manufacturers not playing nice with each other! You’re truly a hero to the HVX community! – Barry Green

“Darn useful thing” 


Toaster: If you’re not converting to QT – what are you doing with your MXF files???  Is there a better way to deal with HD data / info?”Barry Green: Of course there’s a better way — just edit them right as they are. Every NLE on the market can do that (excepting FCP, of course, and Sony’s Vegas). But you can get that same functionality with Vegas or FCP by using Raylight.

So forget the whole “log & transfer” step. Pug the card in, drag the files to the timeline, and edit. A P2 card’s fast enough to allow up to six streams of realtime streaming HD, simultaneously.
Imagine when you’ve been out shooting for a week, offloading cards to an external hard disk, and you’ve offloaded maybe 8 or 10 hours of footage… when you get back to your edit station, wouldn’t it be nice to just plug that hard disk in and edit IMMEDIATELY, without going through that Log & Transfer process? Well, you can.

Download the trial copy of Raylight and give it a try.

Toaster: Actually – that’s a nice feature for being able to show clients a cut as well.  A sort of VTR-lite! I’ll have to check out Raylight – being an FCP guy


Mac to PC discussion

if you work between the two Operating systems, Raylight maybe the only RAY of hope


Vegas 8 Pro, Raylight, and Windows Vista – A review


Raylight to the Rescue again getting Avid edited files to work in FCP


solve my Strange 32G P2 problem

Yet another FCP problem… sigh.  My stock answer is always the same: try the demo of Raylight and see if it doesn’t just make all your problems go away…

Raylight is the program Panasonic should have shipped with all their P2 cameras


I recommend to everyone to ditch Apple’s Log & Transfer, and use Raylight instead


Five Reasons Raylight is essential for FCP users wanting ot use P2:

Raylight is, IMO, absolutely essential for FCP users wanting to use P2. It does many things for you. The first of which is, all that time you spend in the log & transfer window just disappears. Raylight creates quicktime reference files instantly, so you can just plug in your external drive and edit instantly. No importing, no logging and transferring, just immediate editing.

Second thing is, FCP’s import window occasionally just refuses to import perfectly valid clips.  Raylight always imports them.  So you’ll save yourself some frustration there.

Third, Raylight uses the metadata, and in fact can use it rather intelligently. It can sort your clips based on the metadata into individual project folders, doing some manner of media management for you automatically.

Fourth, you get access to the User Clip name function, so you can name your clips with custom names in-camera, and Raylight preserves them. So when it comes time to edit, you don’t face a bunch of 0003RU.MXF files, you instead get “Marriott Commercial Take 1.mov”-style names.

Fifth, Raylight lets you author virtual P2 cards and export them back out to cards, if you have need of doing so.

Run, don’t walk, to get it.  It’s the best P2/FCP workflow enhancement tool on the market.

That’s why I think Raylight is so nice. You work off the MXF files.


P2 Import Mystery
Wish Apple would get with it and allow FCP to use MXF files directly but until then Raylight is the way to go.


“I’m going to be shooting for 10 days straight (no editing for a couple weeks at least), and I’ll have multiple shots – likely hundreds. How can I organize them??”

“If you’re doing lots of projects and you want to organize this stuff and you want to take advantage of the power of the metadata and you want to use FCP, all together, then I highly suggest you get Raylight. Raylight knows how to use and preserve the metadata, it knows how to name your clips with proper user clip names, and it can even sort the clips based on the metadata so it can put different clips in different bins automatically.”

Workflow, working with P2, in the Field and in the Studio


“Spend $195, get Raylight, and put all the FCP importer bugs behind you once and for all. FCP’s importer is notorious for occasionally refusing to import perfectly valid clips.”  [DVXUSER.ORG]


DVFilm Maker review


Getting Quicktime files created by Final Cut Pro working on  a PC.

“Yeah it would be great if you could just capture any old codec in QuickTime on a Mac and drop it into Avid on a PC. But doesn’t work that way. HVX logged and transferred into FCP becomes DVCPROHD QuickTime .MOV, which is not a codec that Windows QuickTime player supports.”
.
.

“An alternative is to have your Avid editor install
the Raylight DVCPRO-HD Decoder software, which was
designed specifically to overcome this quicktime incompatibility. Apple doesn’t
support DVCPRO-HD on the Windows version of Quicktime, but if you buy &
install the Raylight Decoder, it adds DVCPRO-HD
decoding to Windows Quicktime which will mean that your Avid guy can now use the
files.”

Portions of this post duplicated HERE at DVFilm.com

Understanding Video Recording Framerates

Understanding Video Recording Framerates

Here is an excellent explanation of framerates and when you might want to use them.  A summary table follows:

FPS


description


examples


12 fps:
usable for extreme fast motion, twice as fast as normal motion.
In the indie hit film “El Mariachi”, director Robert Rodriguez made use of 12fps for fast-motion scenes such as the hotel front desk clerk scrambling to the telephone to make a call.
18 fps:
this is the frame rate that most 8mm home movies were .
If you’re looking for the Keystone Kops or Charlie Chaplin look, 18 fps is where you should start.
20 fps:
20 fps is a fast-motion effect that’s not nearly as exaggerated as 12fps is, but it’s fast.
If you wanted to show someone running extremely quickly, exaggeratedly quickly in fact, 20fps might be a good choice for that.  It starts to push the bounds of what the audience can believe is “real”, but it’s very fast motion without being exaggeratedly fast.
22 fps:
this is a subtle fast-motion effect.
22 fps is a very popular frame rate for karate action movies – shooting at 22 fps and playing back at 24 fps makes motion look very fast but completely believable.  Shooting a car chase or a fight scene at 22 fps will lend an added edge of excitement and action to your scenes.  The 50Hz camera’s equivalent would be 23fps.
24 fps:
this is the standard movie film speed.
Shooting at 24 fps and playing back at 24 fps gives your footage the temporal feel of motion picture film.  This is the speed you’d normally shoot all dialogue scenes and “normal action” scenes.  The 50Hz camera’s equivalent would be 25fps.
26 fps:
like 22 fps, but in reverse.  This frame rate can add a subtle, subliminal slow motion effect to your footage.
The effect is very mild. Things moving slower than normal can be perceived as being “larger than life” – if you want to add a bit of elegance and grandeur to your scene, but don’t want it to be obvious as to what you’ve done, 26 fps can add that additional element of drama.  The 50Hz camera’s equivalent would be 27fps.
30 fps:
this is a slow motion speed.
It’s mild slow motion, but it’s noticeable.  It’s not very subtle, it’s the first of the real slow motion speeds.
32 fps:
just a little slower than 30 fps.
If you’re shooting your main program in 720/30p mode, filming at 32fps and incorporating in your 30 fps project can give you a similar slightly-larger-than-life feel as 26 fps does in a 24fps project.
36 fps:
at 36 fps, the scene is most obviously slow motion.
Action takes 1.5 times as long to play out as it took to shoot it.  36 fps is as slow or slower than many movie cameras could shoot at.
48 fps:
full-fledged slow motion.
This is a “walk-away-from-the-explosion” caliber slow motion speed.  48 fps makes everything take twice as long to play back as it did to shoot it.
60 fps:
super-slow motion.
60 fps is suitable for shooting explosions or extreme slow motion scenes.  It’s the slowest slow motion possible on a conventional video camera.  The 50Hz camera doesn’t really have a direct equivalent.